Hello my crafty and creative friends!
This week, I'm working on some last minute Halloween projects.
Nothing extravagant...
This week, I'm working on some last minute Halloween projects.
Nothing extravagant...
but all...fun!
I wanted to create a Halloween gift bag for a very special 2 year old that we love pieces!
I opted to make this the #1 project..because as soon as it was done...and filled with goodies...
I wanted to create a Halloween gift bag for a very special 2 year old that we love pieces!
I opted to make this the #1 project..because as soon as it was done...and filled with goodies...
It needed to be shipped to our favorite little trick or treater!

Here's a description of how I created the bag...and card...and tissue paper...and bow!
I started with a plain white gift bag.
Stamped on the front of the bag ...and colored the stamped images with Copic markers.
The stamp set is a CTMH stamp set that I have had...forever
called Frightfully Fun
After the images were colored...I added some Nuvo Jewel Drops.
I didn't stamp images in the center of the bag.....
because I knew that it would be partially covered.
called Frightfully Fun
After the images were colored...I added some Nuvo Jewel Drops.
I didn't stamp images in the center of the bag.....
because I knew that it would be partially covered.

Next....I used the same stamp set
to add a coordinating pattern to some white tissue paper.
I placed the 3 little stamps on one block randomly
and stamped all over the tissue paper..turning the stamps/block
to avoid uniform positioning of the stamped images.
to avoid uniform positioning of the stamped images.

Then..I used the ghost stamp to fill in the white spots on the tissue paper that needed an image
I set the gift bag aside ..allowing the Nuvo Drops to dry...
and I also set the tissue paper aside..

Next...I created the vellum pocket for the front of the gift bag.
I cut a piece of vellum that was as wide as the bag...and a few inches high...
approx 8 x 5
I used dark slate grey card stock to frame the velum.
I used dark slate grey card stock to frame the velum.
I did this by cutting 1 inch strips of card stock...
and scoring each strip at the half inch mark.
and scoring each strip at the half inch mark.
I placed Scor -Tape adhesive on both sides of the crease
of all 4 strips of scored card stock
I placed the vellum into the creased folded card stock
and pressed down to adhere the Scor-Tape to frame the vellum as shown.
I placed the vellum into the creased folded card stock
and pressed down to adhere the Scor-Tape to frame the vellum as shown.

I placed Scor-Tape on one side of the frames vellum...
on the 2 short sides and one of the long sides.
I left one side without Scor-Tape...so that it would be the top opening of the pocket.
I left one side without Scor-Tape...so that it would be the top opening of the pocket.

I set the vellum pocket aside...
along with one little pumpkin that I stamped...colored...and cut out.


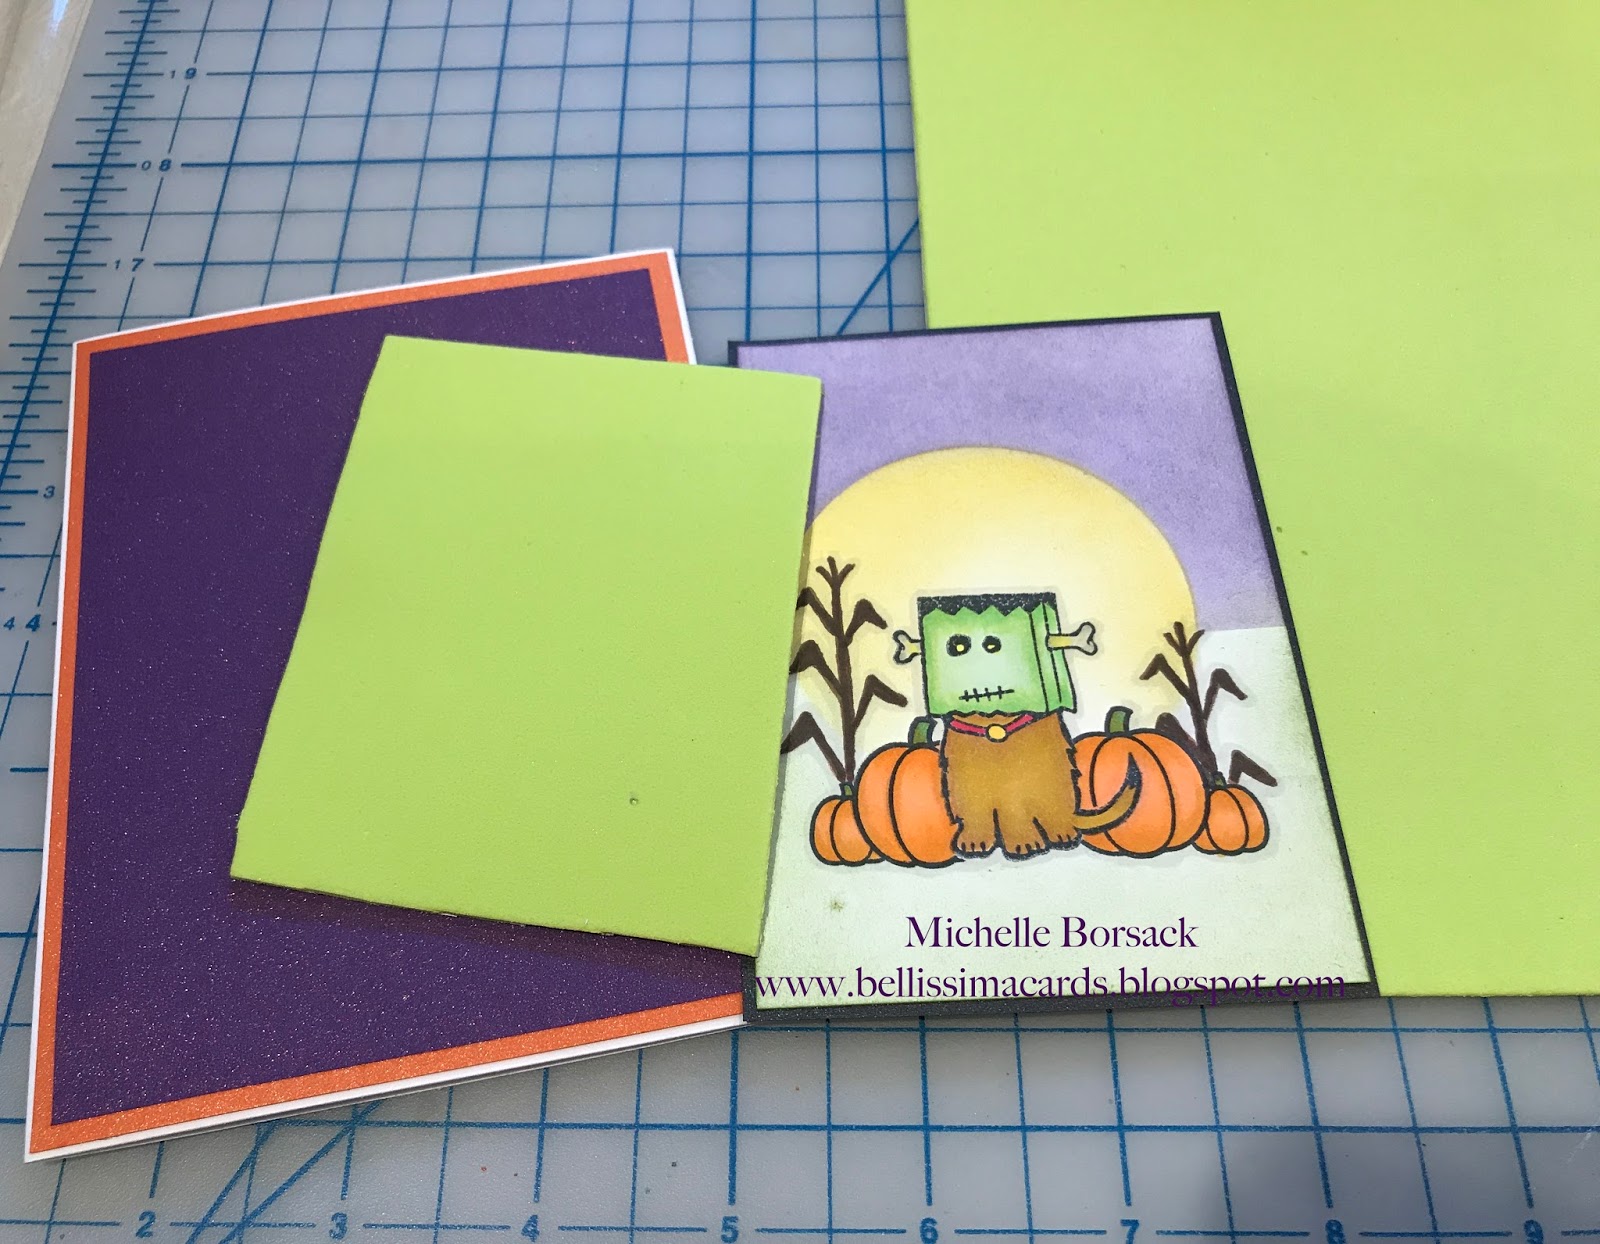
Next..it was time to create the card...
I chose a Frankendog image from Inkadinkado's Ghouls & Goblins stamp set.
(I have had this stamp set for many years)
*I gave this little dog the name "Frankendog"...it's not Inkadinkado's name for this stamp
I stamped the Frankendog image...
and used masking to add the pumpkins and corn stalk images to create a scene around the dog image.
(I masked the dog to add the pumpkins...
and I masked the pumpkins to add the corn stalks)
*The pumpkins and corn stalks are from
Lawn Fawn's Happy Harvest stamp set
I created the large harvest moon glow behind the dog by punching a circle in a piece of card stock
to create an inking template.
I inked the moon glow and background colors with ink...and Clarity stencil brushes.
I chose three LCI metallic card stock colors for matting.
Then, I stamped and matted the sentiment
and started putting the card together.

First I did all of the matting...
The large green piece in the photo is self adhesive fun foam
which I used behind the image layer to add lift and dimension.

I cut the fun foam to the size that I needed for the image layer.
I put a few strips of Scor-Tape on the back of the matted image layer
I put the sticky side of the fun foam face down...onto the Scor-Tape

Then.I added Scor-Tape to the face-up side of the fun foam.
and...
Because I always go overboard with adhesive...(haha)
I added some ATG adhesive here and there to fill in the areas between the Scor-tape

I flipped the matted image layer over..
fun foam & adhesive side down...
and positioned it on the matted card front.
Then I got out foam dimensionals...
to add to the back of the hand cut & matted sentiment banner.

I placed the sentiment banner onto the card
and
applied some Nuvo Jewel Drops to the card.

Here's a close up that shows all of the matting and
the great dimension created with the fun foam and dimensionals...
as well as the Nuvo Drops.

Here's the finished card
(I LOVE this adorable Frankendog!)

Next...
I positioned the vellum pocket on the front of the gift bag
and added the little pumpkin to the bottom corner of the pocket.
I got out all of the goodies for the bag...

When the Nuvo Drops were dry..
I placed the card into the transparent pocket
and placed the stamped tissue paper and goodies inside of the bag

Next...I got out my DecoFun Bow Maker
to create a triple loop bow with orange dotted grosgrain ribbon
from The Ribbon Place.
You can see the Bow Maker and Ribbon HERE
After my success with making a double loop bow with the DecoFun Bow Maker
I got daring...(and confident with my new found ability to create a bow!!)
so..I thought that I'd try making a triple loop bow for this Halloween gift bag.
I cannot believe that two days ago I could not make a simple single loop bow...
and now...Thanks to the DecoFun Bow Maker...I am making triple loop bows!
I've tried so many bow making tools over the years...
None have made a bow maker out of me..
because
None were as easy as the DecoFun...
Looking at this triple loop bow makes me feel so happy.
I DID IT!
Once the bow was made...
I filled the bag...

In the end...I was very happy with the
gift bag...card...tissue paper...and bow...
and how each turned out...
and
how nicely they all came together.

The possibilities are endless with this project.
Just switch up the stamp set...
and you can create a gift bag for any occasion
any theme,,,,any Holiday...event...or Season!
By the time you read this blog post on Tuesday
this gift bag full of goodies will already be on it's way to our favorite little trick or treater!
It's been lots of fun creating this project...and filling the bag with goodies...
but the real fun and joy is in sending it to the cutie who will receive it!
Thanks for visiting today...
Have a terrific Tuesday!
Michelle.
Michelle this is the cutest cutest card and bag ever with the most gorgeous bow that I've ever seen I really ! I can't wait until Christmas when Santa brings my bow maker!! 🎈🐢👻🎃😈🐢🍭maybe he will bring it sooner! 🐢
ReplyDeleteThanks so much Therese!
ReplyDeleteI really enjoyed putting this little project together...
You're going to have a ball creating hair bows...maybe Santa will make an early visit to your house!)