Saturday, August 17, 2019

Creating a Poinsettia Card...2 Ways

Hello my crafty and creative friends!

I am SO excited about the cards that I am sharing today...and my excitement is about a few things.

#. I am thoroughly enjoying our Blue Knight Design Team August Winter/Holiday/Christmas Themed Card Making Marathon!

#2. I have FINALLY found a poinsettia stamp/image that I like.

#3. I was able to create a PanPastel vintage-toned background...something that I have been wanting to do for a while now....but kept forgetting to try.

So...my excitement about today's cards means that I am going to dive right in to sharing them with you...no more chit-chat (at least for now...)

I created both of today's cards with Blue Knight Rubber Stamps POINSETTIA stamp.
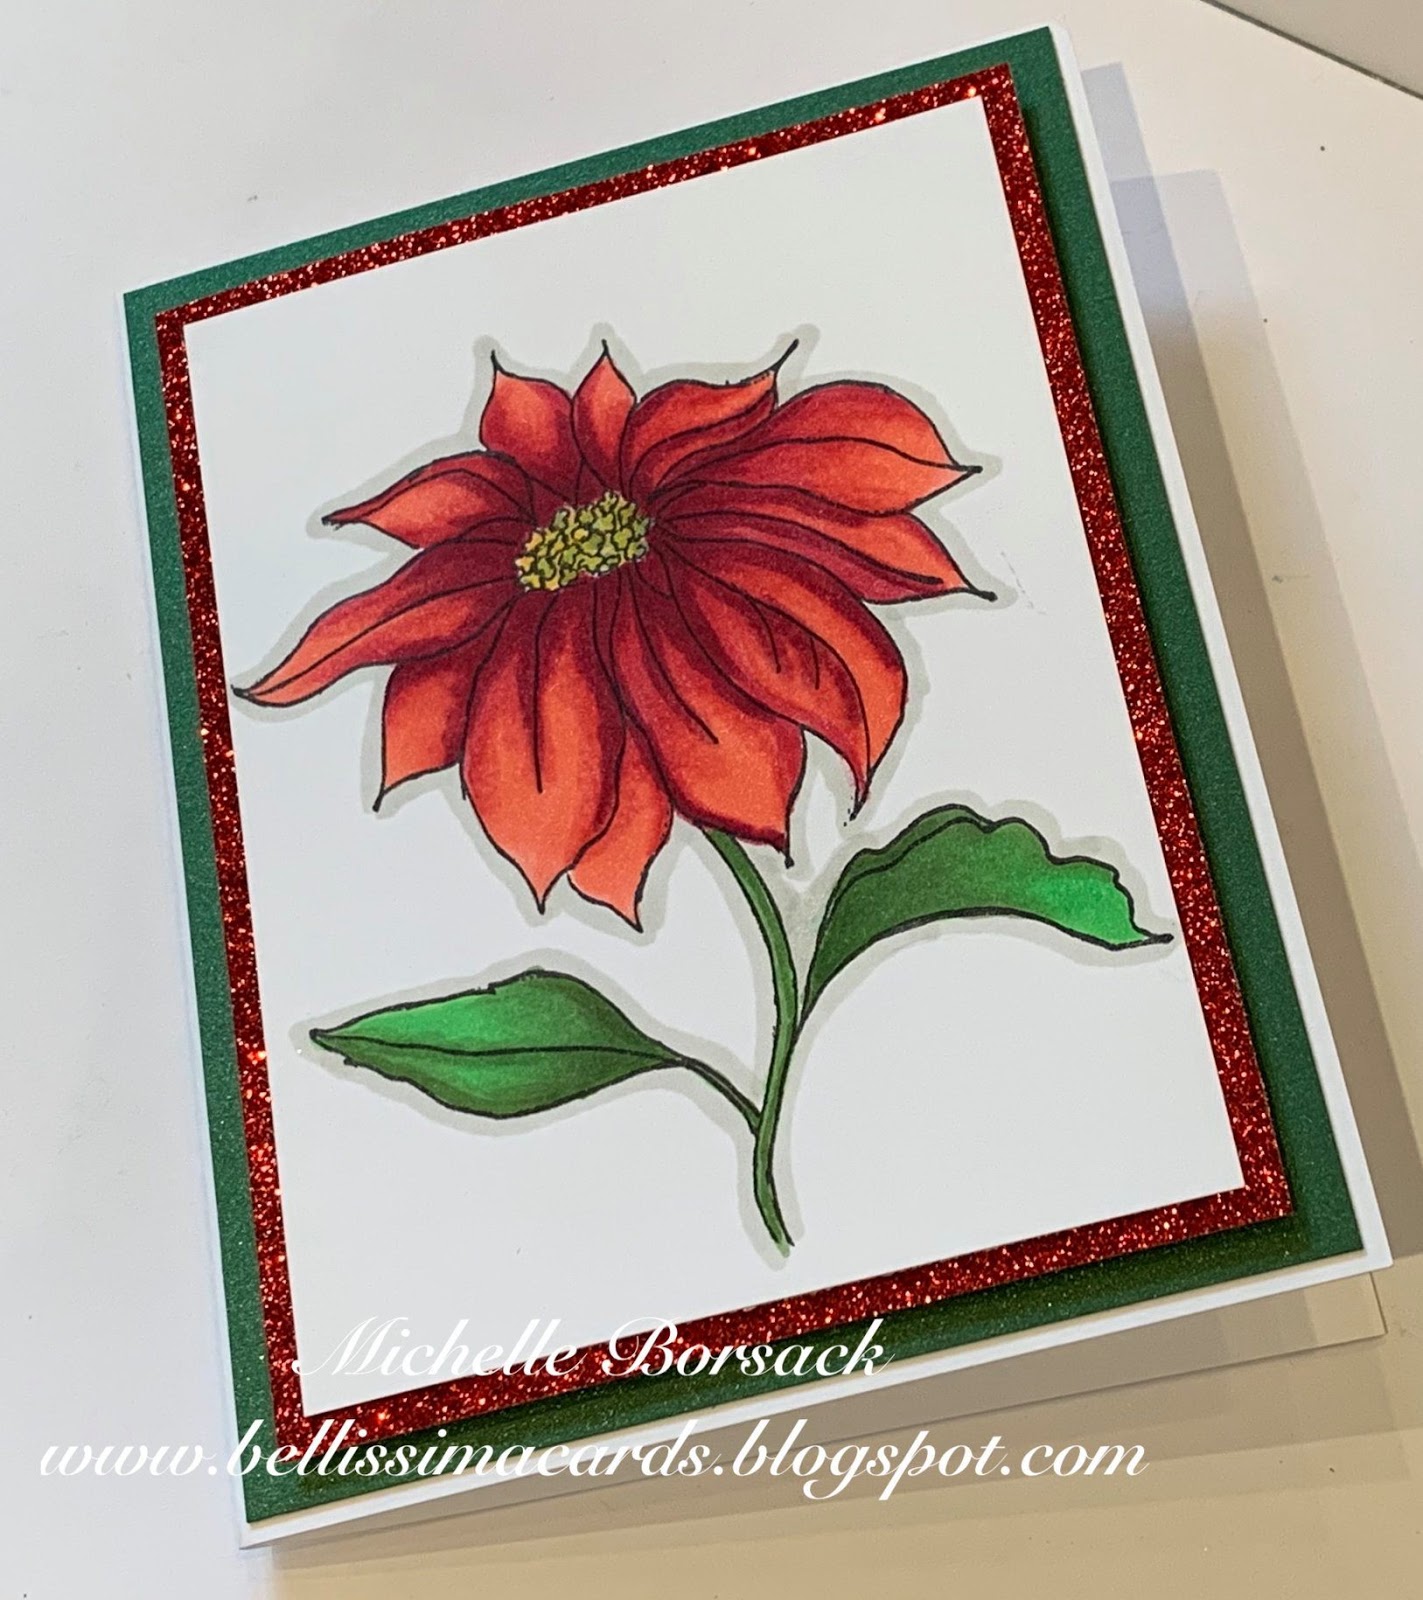
I'll share the Copic colored version first

I did basic Copic coloring, blending and shading to create this card.
I wanted a very clean and crisp look..so I opted to leave the background white.
For matting the image layer, I chose traditional Christmas red glitter card stock and for the larger mat layer, LCI Paper's metallic green card stock was perfect!

CAS...bright...crisp...and a POINSETTIA image that I really like...a lot.
I can now say that after 20+ years of card making...I have made a POINSETTIA card that I'm happy with.
I will NOT be selling THIS POINSETTIA stamp at any of my crafty garage sales in the future.
THIS one is a keeper! 💗


Now...the second card...
(Be still my heart)
This card made my crafty little heart so happy.
Heat embossing this beautiful POINSETTIA with gold embossing powder and coloring this image with Blue Knight's PanPastels was so much fun!
Blending colors...creating colors...shading the POINSETTIA petals and leaves...and creating the background that I've had in mind for a while were all such wonderful creative experiences.
Both mat layers were created with LCI Paper's metallic card stock...which added a beautiful subtle shimmer to this already shimmery card.
I used foam to position the matted image layer for added dimension.


Look at that gorgeous shimmer....from the heat embossing and the metallic card stock!

I had the best time creating today's cards.
I enjoy both methods of coloring images...Copics...and PanPastels...
Both looks are looks that I seem to gravitate to whenever I create a card and combining that with a great image brought me lots of card making joy!

I've got a few helpful links to share:
You'll find
The POINSETTIA stamp HERE
The Blue Knight Select PanPastels HERE
and the LCI Paper metallic card stock HERE


I hope that you've found a little bit of inspiration here at my blog today!
Thanks for visiting...
Wishing you a wonderful day!
Michelle.

Saturday, August 10, 2019

Creating A Snowy Birch Path Card

Hello my crafty and creative friends!

Today I'm sharing a Winter themed card as one of my weekly project for Blue Knight Rubber Stamps August Winter/Holiday/Christmas Themed Card Making Marathon.

I've chose Blue Knight's BIRCH PATH stamp for today's card


This BIRCH PATH snowy Winter scene card was a cinch to create and that means it one of those cards that are ideal for Holiday card making because you can make a stack of them...or lots of them...easily.

I started by stamping the image with Memento Tuxedo Black ink using a stamp positioning tool.
*I left the stamp in in the tool after I stamped the image so that it would be in position for the second stamping.

I used Blue Knight Select PanPastel palettes to add color to the image.
That's the super speedy part because PanPastel coloring is really easy...and the color applies and blends easily.

Although the snowy areas look like they're not colored...they were!
I applied White Pearl (Fine) Shimmer for a snowy shimmery tint
When the image was colored, I matted it on silver mirror card stock and positioned it on a blue card base with foam, for added dimension.

And that's it!
Wha-la!
A card!
See?
This card IS as quick and easy as I told you it would be!

PS
I didn't add a sentiment to this card...yet....
(Because I couldn't decide which sentiment I wanted to use. 😉 )
Decisions Decisions.

Although this month is all about Winter.Holiday/Christmas card making for all of us on the Blue Knight Design Team...I do want to share one more card pic with you...so that you can see how versatile the BIRCH PATH stamp is.


Just by changing up the PanPastel colors that I used...I transformed the stamped image into a Springtime scene.
Instead of a snow rimmed path...I added blended tones of blue to transform the path into a stream.
Instead of shimmer snowy landscape areas...I added grassy and light soil colors to the image

(I also added the dog from the COWGIRL and COWBOY stamp set to this scene)
And, because the trunks of birch trees are generally shades of white/off white...I left them white.

(Yes...I'm sure that you noticed...no sentiment again...because again...I could not decide....But let's just say that I deliberately did that so that YOU can see and appreciate the entire image!...That sounds better than "Michelle couldn't decide")

I hope that the snowy Birch Path  card has inspired you today...and allowed you to realize that not every colored image has to be a labor intensive project....especially if you use PanPastels
(If you'd like to see PanPastels in action and exactly how easy they are to use..head over to the Blue Knight YouTube channel HERE....to see a few of Lynn's PanPastel videos)

I also hope that seeing the Springtime version of today's featured stamp and card that you've been inspired to see versatility when you're creating.

Here are a few useful links

You'll find
The Birch Path stamp...HERE
Blue Knight Select PanPastel Palettes...HERE 
and the Blue Knight Rubber Stamps YouTube Channel...HERE

Thanks for stopping by today!
Wishing you a wonderful and creative day!
Michelle.