Thursday, August 31, 2017

Day 4....The Last Day of Fabulous Flora Card Making

Well...here we are!
Day 4...the last day of sharing cards created with
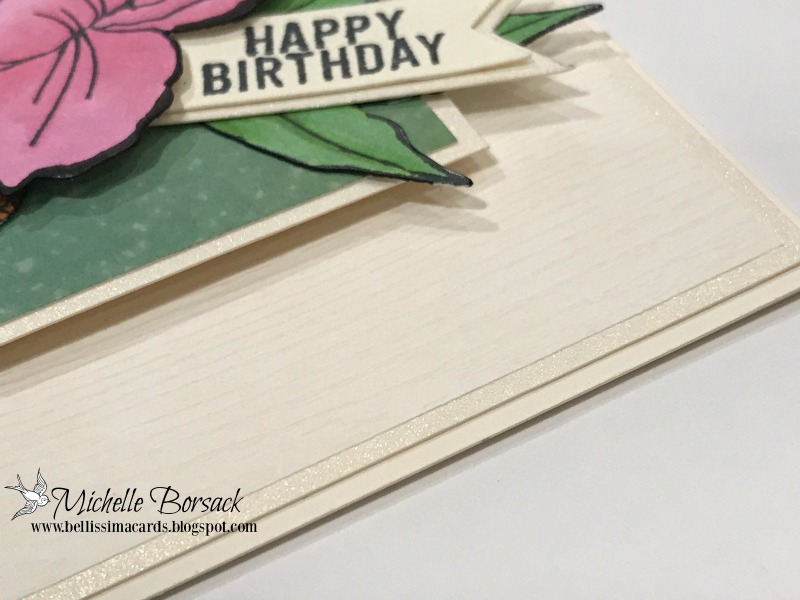
Stampin Up's Fabulous Flora stamp set.
(An oldie..but goodie)

I've got 2 cards to share with you today...
Same sketch...
Same worn wood print and burgundy metallic matting...
Same Copic coloring...
with
2 different sentiments.

 The first card has this beautiful quote from Darkroom Door stamps
called "Memory"
(A favorite quote stamp of mine)
The image layer on both cards was positioned with fun foam for added dimension. 
The worn wood print is from a 12 x 12 paper pad
and the matting was done with LCI's metallic card stock.


For the second card..
I chose another beautiful sentiment...
(sorry....I can't remember who makes this sentiment stamp)


I've enjoyed creating and sharing 4 days of cards with you...all created with
SU's Fabulous Flora stamp set.
I am very much a CAS card maker...
The 4 main images in this stamp set are ideal for CAS card making.
and as I always say...
Every card does NOT need to be a big hoop-la extravaganza to create.
Sometimes...less is more...
and for that...CAS card making is the way to go!

I hope that you've enjoyed seeing these 4 days of cards...
as much as I've enjoyed creating them...and sharing them with you 
...here...at my blog.

Thanks a bunch for visiting (again) today...
Wishing you a wonderful day!
Michelle.


Wednesday, August 30, 2017

Fabulous Flora Day 3

Hello my crafty and creative friends!
Thanks for joining me today for Fabulous Flora Day 3 (of 4)
(Yes...tomorrow will be the last day of cards created with this great Stampin Up stamp set.)

In addition to the SU Fabulous Flora stamp set...
To create this group of CAS cards..
I used gold and chocolate brown metallic card stock for matting and layering...
Copic markers for coloring...
and assortment of sentiments from a few different companies...
and fun foam for adding some lift to the matted image layer.

The gold metallic card stock is amazing...
It's got LOTS of great shimmer.
I also like this Thank You card style sentiment.
It says Thank You...without actually saying...Thank You.


There's always room in my card stash for a generic "Just Because" card


and the last card....
with a lovely quote.


I've been enjoying creating CAS cards with this SU stamp set
and look forward to sharing the last of the cards with you tomorrow.

Thanks for visiting...
Have a wonderful Wednesday!
Michelle.


Tuesday, August 29, 2017

Fabulous Flora Day 2

Hello my crafty and creative friends!
I'm back with Day 2 of cards created with Stampin Up's FABULOUS FLORA stamp set
(An "oldie...but a goodie" stamp set that I've had for a while.)

Today I am sharing 4 CAS cards...created with one of the images from this stamp set.
Each image was Copic colored.
I used an assortment of sentiments...
Some black and deep red LCI metallic card stock for matting...
and fun foam for adding dimension to the matted image layer.

First...a card with a sentiment that can work for various occasions...
Birthday...retirement...or just to say Hello to someone special.
I like the contrast of the image colors and the deep red (almost burgundy) metallic card stock
and...
the sharpness of the narrow black metallic matting the image layer.


I LOVE this Shakespeare in Love quote...


This image is great for all sorts of cards...
It's very versatile.


and the last card with this image...
with words of wisdom from Louisa May Alcott
(Who always seemed to know exactly what to say...all of the time )

So there you have it...Day 2 of card making with the Fabulous Flora stamp set>

I hope that you'll visit again tomorrow for Day 3
Have a great day!
Michelle

Monday, August 28, 2017

Fabulous Flora Revisited...Day 1 (of 4)

While I am always happy to add new stamps to my ever growing collection
I also really enjoy going through my stamp drawers...category by category...
to revisit old favorites...
and pulling a few oldies out now and then to create some cards with.

I recently came across a Stampin Up Hostess set called FABULOUS FLORA
and decided to ink up each of the floral image stamps in the set
to create a stack of cards with each of the 4 different images. 

As I usually do...I kept the card making very CAS...
got out a few sentiment stamps...metallic card stock...Copic markers...
and some fun foam of adding dimension.
And...
This is what I wound up with...

I created 2 of this card...
using chocolate metallic card stock for matting the image
and a gorgeous bronze metallic as the main mat layer.
The Emerson quote stamp is by IO (Impression Obsession)


I created this card using the same metallics...
and added a beautiful sentiment (that is by a company that is no longer in business.)


I love the simplicity of this fig and leaves image...
as well as the other 3 images in this stamp set)
and I'm really happy with my choice of metallic card stock colors.
(The bronze is gorgeous)

I'll be sharing cards, over the next few days...
created with the other images in this FABULOUS FLORA stamp set...
and I'll hope that you like the images as much as I do!

Thanks for visiting today...
Have a terrific day!
Michelle.

Sunday, August 27, 2017

Beautiful Birds

Hello my crafty and creative friends!
Today..I'm sharing 2 CAS cards with you...
both created with a favorite stamp of mine...
A NEW DAY...by WPlus9

I colored each image with Copic markers...
Chose metallic card stock for matting...
and added sentiments from Honey Bee Stamps HAPPY EVERYTHING stamp set.

In the past...I've colored this image with pencils..Copics...and I've also water colored the image
It's almost impossible to choose which might be a favorite.

Today, though..I am loving the clean crisp and bright look of these two Copic colored cards.
I wanted to add some dimension to this card...so I positioned the matted image layer
with fun foam for a nice solid and sturdy lift...and added dimension.


I rarely have Anniversary cards in my stash...
so I though that I'd chose a pretty scripty Anniversary sentiment for one of today's cards.


Both of today's cards truly reflect my preferred style of card making...
CAS
Clean And Simple really feels "right" to me...
and even though I am always happy to venture beyond my usual card making repertoire...
Somehow...I always (and happily) come back to CAS card making.

Thanks for visiting today, my friends...
Wishing you a wonderful and creative Sunday!
Michelle.

Saturday, August 26, 2017

Daisies

I went through my "Flower" stamp drawer the other day
and pulled out some stamps/stamp sets that caught my eye
and that I felt like creating cards with.
Some were brand new...never inked up
and some...are old favorites.

Today...I'm sharing a few cards created with a stamp that I've had for quite a while...
but had never used.

Daisy
By Our Daily Bread Designs

I created a stack of 6 cards
with an assortment of sentiments from various companies
All of the naming for today's cards was done with metallic card stock
and the images were colored with Copic Markers.
I embossed the largest green metallic card stock layer with an embossing folder
to add texture to this card.

I like the combination of blue and green metallic matting and layering.


Here's the second version...

 And the third...
a Birthday card

And the final version...
A sympathy card
I made 3 of this  card...because I never seem to have enough sympathy cards in my stash.


I'm happy that I inked this great stamp up for the first time and created a nice stack of cards
with an assortment of sentiments.
They're an ideal addition to my card stash!

Thanks for visiting today, my crafty and creative friends!
have a fabulous Saturday!

Tuesday, August 22, 2017

Beautiful Birthday Blooms

I've been on a floral kick lately...
Water coloring flowers
Copic coloring flowers..
It's been all about flowers.

Today I'm sharing a birthday card...created what the branch., leaves and blooms
from the Bird Blossom stamp set by Stampendous.

In addition to the stamp set...to create this card I used:
Distress Oxide Ink(s)...GMUND Limba Wood Paper...
Metallic Card Stock and Copic Markers.
The sentiment is by Stampin Up.

I stated out by creating the inked background panel by blending Distress Oxide Ink(s)
and then misting the panel with water.
I stamped out the flowers...leaves and branches...used Copics to color each image
then used the coordinating dies to cut at colored image out. 
I matted the wood grain paper...and the inked panel with metallic card stock.
Then I created the little hand cut and matted sentiment banner.


and..this is what the finished card looks like

This card has lots of dimension.
The matted inked panel was positioned what fun foam..a
and the blooms were positioned with foam dimensionals.

The GMUND wood grain paper is a favorite of mine.
I love that it's somewhat sheer.

I like this Stampendous stamp and die set...a lot.
The bird image is really great and I've created cards with it in the past.
This time, though...
I just felt like creating a card with the blooms...branch..and leaves
and I'm planning on making a few more cards like this one...with an assortment of sentiments.

Thanks for visiting today, my crafty and creative friends.
Wishing you a wonderful and creative day!
Michelle.

Monday, August 21, 2017

Water Colored Daisies

Sometimes.
I have stamps that I really love...
and use often
DAISY THANKS...by Stampendous...is one of those stamp sets.

This being said...
I haven't used this daisy stamp set in quite a while.
But...I felt like water coloring..and thought that I'd ink up the daisies..
and create a few cards.

I stamped the images onto Spectrum AQUA card stock with Hero Arts INKTENSE ink
and water colored the images with ZIG markers and a water brush.
Each of the backgrounds were painted with Distress ink.
I used an assortment of sentiments for a few different stamp sets
and chose metallic card stock colors that went well with the water colored images
for all of the matting.
To finish each card..I added a few Morning Dew (clear drying) Nuvo Jewel Drops.

I really enjoyed water coloring this daisy image.
Adding and blending color with the ZIG markers allowed me to get the color 
that I wanted for each bloom.
And...using Distress Ink (original...not Oxide) to paint the background was almost magical...
as I was adding different colors to create a background that complemented the daisies.
I chose to add a sympathy sentiment to the first card
I LOVE the combination of Chocolate Brown metallic card stock and Gold metallic card stock 
for matting the layers on this card.
The brown and gold metallics look great with the daisies and their colors.

You can see the Nuvo Jewel Drops in this close up


I added this sweet sentiment ..by Stampin Up...to the 2nd card

When the third and final card was complete...
I splattered a little bit of peeled paint Distress ink on the image panel...
and added a birthday sentiment and Jewel Drops to finish the card


I think that it's easy to see why this DAISY THANKS stamp set is a go-to favorite of mine...
Especially for the times when I feel like water coloring.

Thanks for visiting...
Have a wonderful and creative day, my friends.

Sunday, August 20, 2017

The Roses of Life...Two Color Palettes...and a Beautiful Quote

Quite a while ago
I ordered a small collection of Carabelle Studio stamps, masks and templates.
I was attracted to the Carabelle style because of it's "art style"
(I have always liked "artistic" stamps)

Finally!!
I had a chance to ink one of them up to make a few cards!

In addition to this Carabelle Studio "The Roses of Life" stamp set...
I also used an assortment of Distress Oxide Ink colors...
metallic card stock for matting 
and Copic Markers to color one of the rose images.
The other rose image was colored with Distress Inks.

For first card that I created ...I used a blue and green color palette...along with some yellow.
I created the background by blending ink colors ...
then used a Tim Holtz splatter stencil to add some green inked dots of color
Next I misted the entire piece of card stock lightly with water to allow the Distress Ink to react.
I let the inked and misted card stock dry completely.
When the card stock panel dried...the roses were tinted with distress ink.
I used gold and dark blue metallic card stock for matting
and positioned the image panel with fun foam for dimension.

The card colors are all very subtle and soft on this first card


For the second version..I wanted a kick of color...
I wanted to go a bit brighter than the first version above.
So I switched up the ink colors for the background...
blended some brighter colors...
used the Tim Holtz splatter-like stencil to ink on some green spots
then misted the entire piece of inked card stock with water.
I also stamped a second image (the roses)...colored them with Copics...
cut them out...
and positioned the colored flowers with leaves over the image  
that was stamped on the inked piece of card stock song foam dimensionals.
I stamped the beautiful quote on an inked piece of card stock
and hand cut the sentiment banner
and..I  also matted the banner with the same  gold metallic card stock 
used to mat the image layer.
Once the banner was completed...I positioned it with fun foam.
The largest mat layer is metallic green.

I like this brighter version of this card..
and I really like the flowers layers over the original stamped image.
(Adding dimension always appeals to me)

You can see the banner and flower dimension here in this photo...
along with the reactive spots on the blended ink ...from the misting

I'm so glad that I had time to ink up this stamp set for the first time.
I like the simplicity of this art-style stamp..
and ...being a quote stamp lover...I can add that I REALLY love the quote.
I've got quite a few more brand-new-never-inked-up Carabelle Studio stamps...
I'm hoping to give each of them a try ...one at a time...in the near future...

Thank for visiting today, my crafty and create friends
Have a spectacular Sunday!
Michelle.

...

Saturday, August 19, 2017

A Short Stack of CAS Water Colored Cards

I got out my YOU ARE ENOUGH stamp set (by Concord & 9th)
with the intention of creating one card...for a friend.
But was enjoying water coloring so much...
so I decided to create a short stack of assorted CAS water colored cards..using the same stamp...
and adding an assortment of sentiments from a few different stamp sets.

In addition to the Concord and 9th stamp set...
I did all of the water coloring with ZIG markers.
Background water coloring was done with color from Tombow markers
I used sentiments from Reverse Confetti...Stampin Up...and Hero Arts.
For matting...I used some matte card stock on a few of the cards...
and Metallic card stock on the others.
To finish the cards I added Clear Drying  Morning Dew Nuvo Jewel Drops to one card
and Crystal sequins to the others.

This is the original card that I wanted to create for a friend who is fighting a huge cancer battle

I continued on with another pink version...
and switched up the sentiment.

I love this large flower...
The design is beautiful...and is ideal size for an A2 card...and is very CAS
(Right up my alley!)
I also love that it gives the appearance of being transparent.

I used a sympathy sentiment of the last of the 4 cards
and switched to Nuvo Drops (instead of sequiins)
Sequins just never seem be appropriate for a sympathy card...
they're a bit too bling-y, I think)

I am a lover of water coloring...
for me..it's relaxing..and enjoyable..
I stopped myself after creating 4 cards...because it was getting late
but truthfully....I probably could have just continued on and made many more.

Thanks for visiting today...
have a wonderful Saturday...
Michelle

Friday, August 18, 2017

Poppies.....Two Ways

Hello my crafty and creative friends!
I've got some poppies to share with you today...
Two versions...
Both created with Penny Black's POPPY GEMS stamp
One water colored with Ink(s) (Regular and Distress)
and the other is Copic colored.

I'll share the water colored version first..
I am only partially pleased with this card...
because I hoped to wind up with a deeper red.
I chose black and red card stock for matting...
and finished this card with Nuvo Jewel Drops (Morning Dew...Clear drying)

The second version was colored with Copic markers...
and I WAS able to achieve the depth of color that I wanted.
I am openly saying that THIS version is my favorite of the 2 cards
because the red tones are exactly as I wanted them to be.
I chose the same red and black card stock for matting...
and finished this card with a few crystal sequins.

It felt good to get into my studio for a few hours...
lately my days are dedicated to our newest family member...
who requires LOTS of attention
(and who I can't stop hugging and smooching!)
This little guy is a sweetie...
and I am totally smitten with him
(Look at my boy, Jackson!...And his freckly belly!..Isn't he adorable?)
He was snoozing while I made the poppy cards.
                                       

I hope to take Jackson into the studio with me again tomorrow...
and get back to making a few cards each and every day.
(I adore this puppy...but have REALLY missed being able to spend time in my studio every day)

Have a fabulous Friday, my friends!
and 
thanks for visiting today!
Michelle.

Monday, August 14, 2017

Creating a Stack of Similar....But Different Cards

Hello my crafty and creative friends...
I'm FINALLY back to share a few cards...

Life is a bit topsy turvy these days..(but in a GOOD way)
Our first week with our new puppy, Jackson, hasn't allowed me much time for card making
or anything else for that matter!
It's amazing how one small adorable sweet wonderful puppy 
can somehow change what goes on..or what is routine...in a household & family.

This little guy has been keeping us VERY busy
He is a smart pants...
and is doing great with being trained...sleeping all night...and walking on the leash.
AND...
Jackson now understands "SIT"...and happily gives his paw
(He is a lefty!)
We adore him. 

I DID get myself into my studio twice this week
and enjoyed creating some cards.

I create a stack of 11 cards..
similar..but different...
with a stamp set that I had ordered during one of HSN's crafting days.
The set is called Happy Birthday Critters....by L.D.R.S
Truth be told:
I ordered the stamp and die set because it was kinda cute...
and...
the price was ridiculously wonderful.
This is the set...(by a company that I had never heard of)

I've had this set for quite a while...
and thought that I'd ink it up to create a stack of children's birthday cards.
I used an assortment of prints from different paper pads
and an assortment of solid colored card stock from Stampin Up and LCI
All of he images were colored with Copic markers...
and although this set includes dies..I opted to use my Scan N Cut to cut out each shape
because there were so many.

Each of the large base mats for all of today's cards were embossed with different patterns...
some are embossed with stars...some with dots...
(all are difficult to see in the photos....wish you could see the embossing)
The coral-like color here has small embossed dot -trios.

each of the prints is matter (monochromatically...
in the same color as the larger background card stock.
This card has scattered stars embossed on the large blue layer

The scalloped rectangles were all positioned with fun foam for added dimension
and each the elephant's were positioned using foam dimensionals.
This card was embossed with tiny dots

I stamped and hand cut each of the sentiment banners.
The end of the banner to the far left has a foam dimensional under it...
the right end of the inner has regular adhesive under it
so that it would be balanced over the elevated scalloped rectangle
Each of these large layers are embossed with a tiny star pattern

I enjoyed creating this stack of cards with this nice stamp & die set.
It felt great to spend few hours in my studio
and I'm hoping that as jackson settles in that I can get back to making cards daily
(Wish me luck!)

Thanks for visiting today...
Have a marvelous Monday!
Michelle


Wednesday, August 9, 2017

Thinking of You...and My New Sidekick

Hello my crafty and creative friends!
I've been MIA lately
and THIS is why!

JACKSON!

After many years...14 to be exact...
we have a dog again!
and..
we are thrilled...smitten...and overjoyed!
Actually...
we have had 2 puppies this past week.
Both are rescue puppies.
The first little guy was with us for one week...but had concerning aggression issues
and we were encouraged to return him to the shelter.
We were heartbroken...and knew that we wanted to have a dog
and so....within 24 hour...
we met this sweetie...a rescue puppy from South Carolina
who was being cared for and fostered by a small local rescue organization.

Jackson is a doggy dream come true and we are totally in love with him!
He is smart...a big love... cuddly mush...
and he is the ideal puppy for our family.
and..
like any other puppy...
he requires lots of attention!
(Which has kept me out of the studio...and away form my card making)

Last night, though...
I did manage to create a few cards...
and am happy to share them with you today.

I had a great THINKING of YOU Tammy Tutterow (Spellbinders) stamp that hadn't been inked up ....yet
and thought that I'd match it up with some awesome
GMUND Urban Brasilia Dust Wood Grain Paper (LCI).
I colored the images with Copic Markers
and finished each card with a few clear (Morning Dew) Nuvo Jewel Drops.

and...
this is what I wound up with...
6 CAS cards...3 of each ...3 pink flowers...3 purple

This is the first version...with a purple flower.
I LOVE this GMUND Brasilia Wood Grain paper..
It's kinda like vellum...and kinda not.
It's softer than vellum (more flexible)...it's a bit transparent....and the texture is fantastic! 

I also created 3 cards with a pink flower with turquoise tones.
This one may be my fave
I love the white with the blue...it's so clean bright and crisp looking

I am a fan of Tammy Tutterow's stamp designs..
I really like the font style ..
it's fun...has a casual look...
and it's BIG...the ideal size for an A2 card.

I'm happy to be back today after one week of not having time to create a card.
and I'm happy to share this set of 6 CAS cards with you.

and now...
I'm off...and heading out of the door..
It's time to walk the puppy!
(who, by the way...gets an A+ for his efforts with being housebroken!

Have a GREAT day my friends...
and thanks for visiting!
Michelle


Wednesday, August 2, 2017

Lots of Color...Lots of Water Colored Flowers

I felt like water coloring.
So I did.

It was relaxing...
and I enjoyed it as much as I always do!

I kept it simple...
Using Altenew's Spring Daisy stamp set...
Zig  markers
some metallic card stock for matting
and a stitched rectangle die.
I used an assortment of sentiments by Penny Black & Honey Bee Stamps.

I usually lay my marker or ink down on a tile...
and pick it up with a paint brush when water coloring.
This time...I added color directly to the images with the Zig markers...
then blended with an aqua painter (aka water brush).

I've got lots of color to share today...
(*The beauty of water coloring....color possibilities are endless!)
To create each sentiment piece I die cut the rectangle shape
by placing the die on the center of the water colored panel.
**The "hole" in the center of the water colored panel doesn't matter...
because it is "covered" by the matted sentiment piece and isn't visible
The matted sentiment pieces on each of today's cards was positioned with fun foam.

I added a few clear drying Nuvo Jewel Drops to each completed card.

I wanted to use a different color palette for each card...
and different sentiments for each card as well...

I used metallic card stock for all of the matting on each of the 5 cards

I really enjoy going through my sentiment and quote stamp collection
to find a sentiment that seemed suited to the look of each specific card.


This sentiment is a favorite of mine...


Water coloring is my number one fave thing to do...
and creating this stack of 5 cards was pure enjoyment for me...
The size of the floral image is perfect
for the cards I had envisioned in my mind prior to creating them
and the ZIG Markers offer lots of fantastic color options.
I'm happy to add each of these cards to my "stash"

Thanks for visiting today...
Have a wonderful Monday!
Michelle.