I came home today after being away for a week
(my annual craft getaway with my crafty best pal, Debbie)
When I got home...I found out that a young man that we know and are very fond of
made his Confirmation while I was away
I felt badly that we missed sending him a card and gift during the week..
and so I knew that I needed to create a card ....
ASAP
I had a light bulb over the head moment
and remembered that I had a Stampin Up stamp set with a cross
and sentiments that included Communion, Baptism and Confirmation .
And then...life switched into the fast-forward mode.
CAUTION: You are about to be whipped around at high speed with me if you choose to view the photos that follow
and...
I had no time to set up the light box or any other photo shoot stuff..
so pardon the scenery...and shadows in the pics.
Okay..put on your crafty seat belt...
here we go
My desk chair in the studio has wheels..
This is where I wish that I had a video to share with you
instead of photos
You would be cracking up watching me scoot back and forth
in my chair
in the studio
kinda like Mario Andretti at a NASCAR event.
I got my thoughts together
and then...
Zip Zip...
over to where I keep my SU stamp sets..
Out came the stamp set

then...spin around..grab the MISTI

now...To the right..
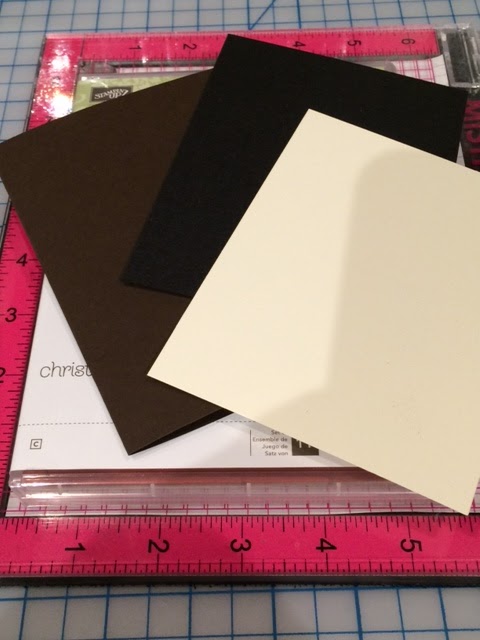
Grab some brown card stock, some ivory card stock and my paper trimmer
Then scoot over to the other end of the room where I keep the shimmer card stock
Grab a sheet of black shimmer
Zip zip..
back to the desk
Cut everything
Base card...Back shimmer mat...
Yes..there's my card stock love again......LCI Metallic Card Stock
I can't seem to make a card without it anymore..
Yes..there's my card stock love again......LCI Metallic Card Stock
I can't seem to make a card without it anymore..
and 2 ivory pieces for front stamping and inside of card stamping
Spin around...do a 380...
get the dimensionals
grab the ATG gun

No spinning around this time...
the Krylon Gold leafing pen was right in front of me, on the desk...
where it always is
in this neat little lucite organizer thing that I have (and love)
then......
Grab a piece of white scrap card stock...
also right there..to the right..on my desk...
For me "white scrap card stock" means Staples 100 lb White Card Stock
which I use to for mock ups..prototypes..masking..
writing shopping list...testing marker colors...taking phone messages...
as a placemat...as a coaster for my sweating water bottle...
jotting down to-do lists...and tons of other things.
Oh yes...I also use it after I've swept the studio..cant find the dustpan./and need to sweep everything up and into the trash can.
That Staples 100 lb card stock wears many hats around my studio.
Speaking of masks...
I quickly cut a mask
(you'll see why in a sec)

Zip zip again...
swing around..
a 180 this time...
Grab the heat gun
and embossing-buddy-adios to static thing
I think that I have everything...
The ink pads missed the photo shoot...
but they were there...to the left of this photo...
Versamark and Memento Tuxedo Black..
both...on standby

Time to use that mask...
and the Krylon Gold Leaf pen

I Placed the mask over the piece of card stock that I was going to stamp
and heat emboss the cross on
The mask was just a teeny bit smaller tan the piece of card stock
I then traced all around the edge
Putting that gorgeous gold leafing on all of the edges
Went over it twice...
to make sure that I had good coverage

Stamped the cross image in Versamark...
added some fine detail Gold embossing powder
turned on the heat gun
and hit the image with some heat
Done!
in a flash
Then added the sentiment...

See?
isn't the leafing nice?
And the cross has some nice edge details that embossed nicely...

One more look...
very CAS
which means...very...ME
Me = CAS...almost always.

Time to stamp the sentiment inside.

Add dimensionals to the back of the shimmery black mat...

Here's a close-up of the black shimmer...
I turned it toward the light so you can see how gorgeous it is.
that makes it look pewter-like...
but thats just because it's so shimmery
it's shimmery..and it's 11l lbs of gorgeous card stock
(amazing what that 1 lb does to make a sheet of card stock
making it feel heftier than a 110 lb piece of card stock..
1 little lb..
big difference

Next up...positioned and attached the black shimmery gorgeousness to the base card

Attached the gold leafed and gold heat embossed front of the card
also with dimensionals

Attached the inside layer of the card
(no dimensionals here)

Scooted over to the big work table
(currently serving as a holding station for oodles and oodles of shimmer card stock
for which I am having a new shelf built in the studio...as we speak (YAY!)
(and how about that fancy prop...a stack of stamp sets to give the finished card a place to pose for this final photo...
(I told you to be prepared...no pretty-posed-set-up photos this time)
And there we have it...
a 10 minute card in 6 minutes...
start to finish..
thanks to my "wheels" ....my NASCAR -like skills when it comes to speeding around the studio...
while seated in my desk chair
and for a very organized studio that allows me to know where everything is...
Without being organized and having everything in the studio labeled
and in it's own place...
this 10 minute card would have taken an hour...
my OCD-ish/Felix Unger ways paid off!

Thanks for the blog visit...
and for taking this high speed ride around the studio with me
Card Loving friends: Communion season is coming....so I'll be adding some Communion cards to the Bellissima Card Shop soon...
Card Making friends: I hope that this card inspires you to zip around your creative space...to create a CAS card of your own...in less than 10 minutes! (6 minutes...to be exact!)
and don't forget to sign up for blog email updates (top right of this page)....so that you'll be ready for the RAK-y giveaways that I'll be starting soon
Have a great Saturday, my friends!
Michelle
No comments:
Post a Comment
Thank you for taking a moment to comment!